Tender Instant Pot Garlic Butter Chicken
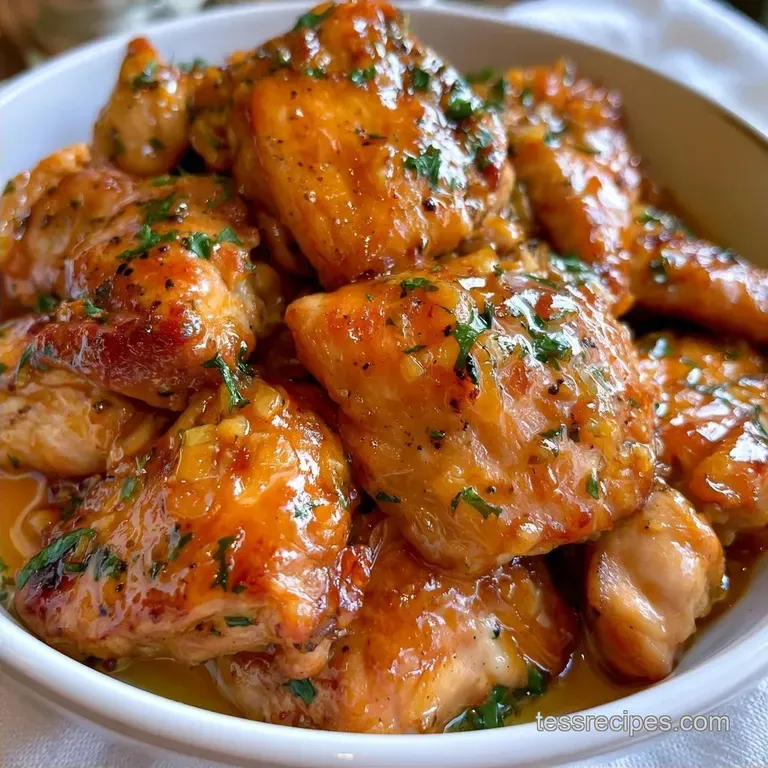
- Time: 10 min active + 10 min cook
- Flavor/Texture Hook: Buttery, glossy sauce with tender thighs
- Perfect for: Busy Tuesday nights or meal prep
The sound of butter hitting a hot pot and immediately bubbling is the only thing that gets me excited to cook on a rainy Tuesday. I remember one specific evening when I was completely drained from work, staring at a pack of chicken thighs and wondering if I had the energy for anything more than a sandwich.
I wanted something that felt like a proper meal, something rich and comforting, but I didn't want to stand over a stove for an hour.
That's when I leaned on the pressure cooker. I've tried the "dump and go" method where everything just slides in together, but it always results in gray meat and a thin, watery sauce. This approach is different because it respects the searing process.
By taking a few extra minutes to brown the chicken, you get that deep, savory flavor that makes the dish feel like it came from a bistro.
You can expect a meal where the chicken is tender and the sauce is thick and glossy. Instant Pot Garlic Butter Chicken works because it balances the heavy richness of butter and cream with the sharp brightness of lemon and fresh parsley. It's the kind of dinner that makes the house smell like a professional kitchen without the actual effort of one.
Why This Recipe Works
- The Initial Sear: Browning the chicken first creates a layer of caramelized proteins. This adds a savory depth that you just can't get from pressure cooking alone.
- High Pressure Tenderness: Using the high pressure setting forces moisture into the thighs. It breaks down the connective tissue quickly, meaning the meat stays juicy even with the high heat.
- Cold Butter Finish: Stirring in cold butter at the end creates a stable, glossy emulsion. This is what gives the sauce its body and prevents it from looking greasy.
Essential Kitchen Tools
For this one, you just need a standard 6 quart or 8 quart pressure cooker. I use an Instant Pot, but any brand with a sauté function and a pressure seal will work.
You'll also want a sturdy wooden spoon or a silicone spatula. You need something that can really scrub the bottom of the pot to remove the brown bits, or you'll likely trigger the "Burn" sensor. A pair of tongs is a must for flipping the chicken without tearing the meat.
If you have a digital meat thermometer, it's a great way to double check that the chicken has reached the safe internal temperature of 74°C, as recommended by USDA guidance.
Ingredient Deep Dive
Before we get to the list, it's worth noting that the quality of your butter matters here. Since it's a primary flavor, use a real unsalted butter rather than a spread.
| Component | Purpose | Substitute Notes |
|---|---|---|
| Chicken Thighs | Main protein and juiciness | Breast: Use 6 mins pressure instead of 8 |
| Unsalted Butter | Richness and sauce body | Ghee: Same fat, slightly nuttier taste |
| Heavy Cream | Thickens and smooths sauce | Coconut Cream: Adds a tropical note |
| Lemon Juice | Cuts through the fat | Apple Cider Vinegar: Tangy, less citrusy |
For a different flavor profile, like something with a creamy coconut base, check out Coconut Chicken Curry.
What You'll Need
- 2 lbs boneless, skinless chicken thighs
- 6 tbsp unsalted butter Why this? Provides the base for the glossy sauce
- 1 tsp salt
- ½ tsp black pepper
- 1 tsp paprika Why this? Adds color and a mild earthiness
- 6 cloves garlic, minced
- ½ cup chicken broth Why this? Necessary for the pot to reach pressure
- 1 tbsp lemon juice
- 1 tsp dried oregano
- ¼ cup heavy cream
- 2 tbsp fresh parsley, chopped
- 1 tsp lemon zest
How to Make It
Phase 1: The Flavor Base
- Set your Instant Pot to Sauté (Medium/High). Add 2 tbsp of butter and wait until it bubbles.
- Season the chicken thighs with salt, pepper, and paprika.
- Brown the chicken in the pot for 3-4 minutes per side until deeply golden. Remove the meat and set it on a plate.
Phase 2: The Pressure Cook
- Add the minced garlic to the leftover butter. Sauté for 60 seconds until fragrant, ensuring it does not brown.
- Pour in the chicken broth and scrape the bottom of the pot thoroughly to release the brown bits. Stir in the lemon juice and oregano.
- Return the chicken and any accumulated juices to the pot.
- Lock the lid and ensure the valve is positioned to Sealing, then Pressure Cook (High) for 8 minutes.
- Perform a Quick Release of the pressure and transfer the chicken to a platter.
Phase 3: The Glossy Finish
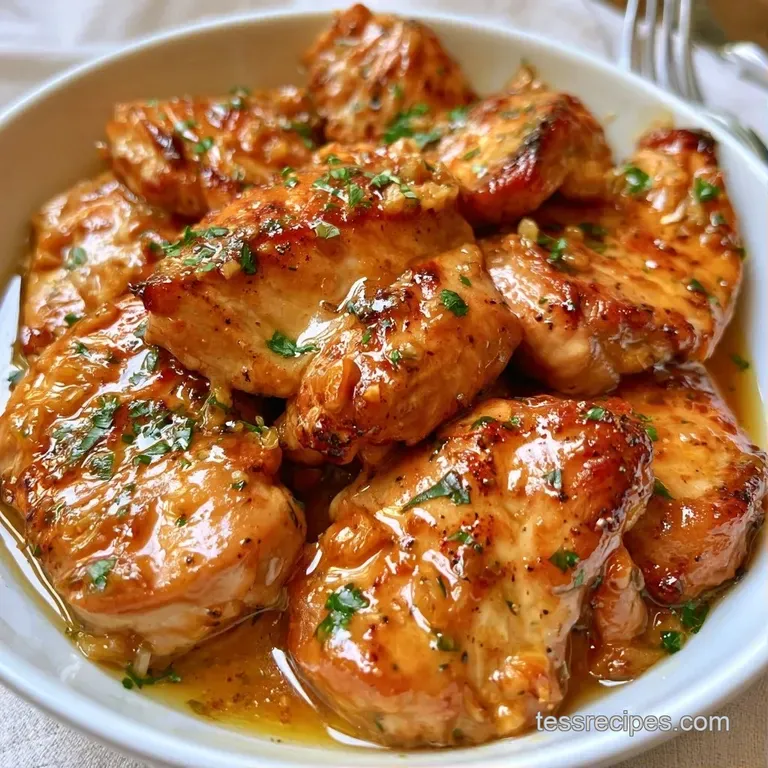
- Switch the pot back to Sauté. Stir in the heavy cream and the remaining 4 tbsp of cold butter for 2 minutes until the sauce becomes thick and glossy.
- Spoon the sauce over the chicken and garnish with lemon zest and fresh parsley.
Avoiding Kitchen Disasters
The "Burn" notice is the most common frustration with pressure cookers. It usually happens because a piece of chicken or a bit of burnt garlic is stuck to the bottom. When the pot can't circulate heat, it shuts down for safety. To avoid this, make sure you're aggressive with the scraping during the deglazing step.
Another common issue is the sauce being too thin. This happens if you don't let the sauce reduce during the final sauté step. You want to see the sauce clinging to the back of your spoon before you pour it.
If your chicken feels rubbery, it's likely overcooked. Thighs are forgiving, but if you've swapped them for breasts, 8 minutes is too long. Breasts need a shorter window to stay tender.
| Problem | Root Cause | Solution |
|---|---|---|
| Burn Warning | Fond not fully scraped | Use a wooden spoon and extra broth |
| Rubbery Meat | Overcooked / Breast used | Reduce pressure time to 6 minutes |
| Thin Sauce | Insufficient reduction | Sauté cream and butter for 1-2 min longer |
Freezing and Reheating Guide
Keep leftovers in an airtight container in the fridge for 3 days. It is normal for the sauce to thicken as it cools.
For longer storage, this stays fresh in the freezer for 2 months. I suggest freezing the chicken and sauce together to prevent the meat from drying out during the second heating.
Avoid using the microwave for reheating if possible. The intense heat can cause the butter sauce to "break" or separate, leaving behind a pool of oil. Instead, warm the chicken in a small pan over medium low heat.
Add a splash of water or extra broth to thin the sauce, and cover with a lid until the chicken is heated through.
To minimize waste, freeze any leftover lemon zest or parsley stems in an ice cube tray with olive oil. You can simply toss one of these cubes into your pan whenever you begin a new sauté.
Creative Twists and Swaps
If you want something with a bit more zing, my Lemon Garlic Chicken recipe is a great alternative. For those who prefer a sweetness to balance the garlic, try adding a tablespoon of honey during the final sauté step.
If you're looking for a healthier version, you can swap the heavy cream for Greek yogurt. Just make sure to turn off the Sauté function before stirring in the yogurt, as boiling it can cause the yogurt to curdle.
| Goal | What to change |
|---|---|
| Lighter Meal | Replace cream with Greek yogurt |
| Sweeter Glaze | Add 1 tbsp honey to the finish |
| Extra Zest | Double the amount of lemon zest |
How to Serve and Enjoy
This dish is incredibly rich, so it needs a side that can cut through the butter. I love serving it over a bed of wild rice or a side of roasted asparagus. The sauce is the star here, so whatever you choose should be something that can soak up that extra glaze.
If you're serving this for a family dinner, keep the chicken in the pot until the very last second. The residual heat keeps the sauce silky and prevents it from thickening too much before it hits the plate.
Stovetop vs Oven Comparison
Since some people wonder if the Instant Pot is really the best way, here is how it stacks up against other methods.
| Method | Total Time | Flavor Profile |
|---|---|---|
| Instant Pot | 30 min | Concentrated sauce, very tender |
| Stovetop | 45 min | Better crust, higher risk of dryness |
| Oven | 60 min | Evenly cooked, milder sauce |
Debunking Common Myths
You might have heard that searing meat "seals in the juices." This is actually a myth. Searing doesn't create a waterproof barrier; it's all about the flavor. The moisture loss happens regardless of whether you sear or not, but the trade off is worth it for the savory crust.
Another myth is that pressure cooking makes all meat mushy. While this can happen with vegetables, meat only gets mushy if it's cooked for far too long. With a precise 8 minute window, the chicken thighs remain firm but tender.
Recipe FAQs
How long to cook butter chicken in an Instant Pot?
Set the Pressure Cook (High) for 8 minutes. Use a quick release immediately after the timer ends to keep the meat tender.
How to prepare garlic butter chicken?
Sear seasoned thighs in melted butter, sauté garlic, and pressure cook with broth and lemon. Stir in cream and cold butter at the end for the glossy finish.
Why is my chicken rubbery in the Instant Pot?
Overcooking is the main cause. When meat stays under pressure too long, the muscle fibers tighten and become tough.
What are common mistakes cooking chicken in an Instant Pot?
Skipping the searing process. Browning the chicken first develops a savory crust and depth of flavor that pressure cooking alone cannot replicate.
Can I use chicken breasts instead of thighs?
Yes, but reduce the pressure time. Breasts dry out much faster; see how we manage similar cuts in our lemon chicken breast guide.
Is it true that you must use a slow cooker for a thick sauce?
This one's false: Sautéing cold butter and heavy cream at the end creates a rich, glossy glaze in just a few minutes.
How do I stop the sauce from separating?
Stir in the cold butter slowly while the pot is on Sauté. This emulsifies the fats for a smooth, professional texture.
Do I need to add extra water to prevent the burn notice?
No, use the provided chicken broth. Just make sure to scrape the pot's bottom after searing to remove any stuck-on food particles.
Instant Pot Garlic Butter Chicken